Master 3D Photography: A Beginner’s Guide
With the advent of digital technology and innovative equipment, 3D photography has become more accessible than ever. Once the domain of professionals and tech enthusiasts, creating stunning three-dimensional images is now within reach for beginners willing to explore this exciting field. In this guide, we will delve into the fundamentals of 3D photography, discuss the equipment needed, and provide step-by-step instructions to help you start capturing your own 3D images.
Understanding 3D Photography
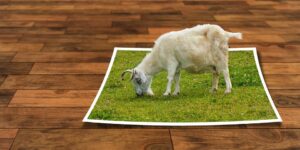
3D photography, also known as stereoscopic photography, involves creating images that give the perception of depth, emulating how the human eye perceives the world. This effect is achieved by capturing two images of the same scene from slightly different angles, similar to the way our left and right eyes view the world. When these images are combined, they create a sense of depth and dimensionality, making the photograph appear three-dimensional.
Essential Equipment for 3D Photography
Before diving into 3D photography, it’s important to gather the necessary equipment. While advanced setups can be costly, beginners can start with more budget-friendly options:
3D Cameras
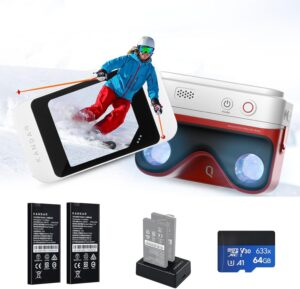
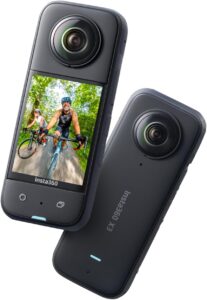
There are dedicated 3D cameras available that are specifically designed to capture stereoscopic images. These cameras have two lenses positioned similarly to human eyes, allowing them to capture the two necessary perspectives simultaneously. Some popular models include the Fujifilm FinePix Real 3D W3 and the Panasonic Lumix 3D1.
Regular Cameras
If you already own a DSLR or mirrorless camera, you can use it for 3D photography with some additional equipment. By using a tripod and a slide bar, you can manually capture the two images needed for creating a 3D effect.
Smartphones
Many modern smartphones come equipped with dual cameras, which can be used to capture 3D photos. Additionally, there are apps available that can help align and process the images to create a 3D effect.
Software
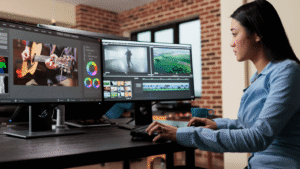
Once you have your images, you’ll need software to process them into a 3D format. Programs like Adobe Photoshop, StereoPhoto Maker, and 3DCombine offer tools for aligning and merging the images to create a cohesive 3D photo.
Steps to Capture 3D Photos
Now that you have your equipment ready, let’s walk through the process of capturing 3D photos:
Choose Your Subject
Select a subject that will benefit from a sense of depth. Landscapes, architecture, and still life subjects with distinct foreground and background elements work well for 3D photography.
Set Up Your Camera
Position your camera on a tripod to ensure stability. If using a single-lens camera, attach the slide bar to allow for easy lateral movement. Ensure your subject is well-lit, as sufficient lighting is crucial for capturing details in 3D images.
Capture the Left Image
Begin by capturing the image from the left perspective. If using a 3D camera, this will be done automatically. For single-lens setups, take the first photo, then carefully slide the camera to the right, maintaining a parallel alignment.
Capture the Right Image
Once the camera is shifted to the right position (approximately the distance between human eyes, about 2.5 inches or 6.35 cm), capture the second image. This image will serve as the right perspective.
Align and Process the Images
Transfer the images to your computer and open them in your chosen software. Use the software’s tools to align the images, ensuring that key elements in the foreground and background match up between the two. This alignment is crucial for creating a seamless 3D effect.
Create the 3D Effect
Once aligned, merge the images using the software’s 3D processing tools. You can create different types of 3D effects, such as anaglyphs (red/cyan) for viewing with colored glasses, or side-by-side formats for viewing with VR headsets or 3D monitors.
Viewing Your 3D Photos
After processing, it’s time to enjoy your 3D creations. Depending on the format, you can view your 3D photos in various ways:
Anaglyph Glasses
For anaglyph images, use red/cyan glasses to view the 3D effect. These glasses are inexpensive and widely available.
3D Displays
If you have access to a 3D-capable monitor or TV, you can view side-by-side images directly on the screen. Some devices also support polarized or active shutter glasses for enhanced viewing.
VR Headsets
For an immersive experience, use a VR headset to view your side-by-side 3D images. This method offers a truly engaging way to experience the depth and detail of your photos.
Tips for Improving Your 3D Photography
As you experiment with 3D photography, keep these tips in mind to enhance your skills and capture stunning images:
Experiment with Depth
Play with the distance between the camera positions to see how it affects the sense of depth. Larger separations can exaggerate the 3D effect, while smaller ones create subtler depth.
Use a Remote Shutter
To minimize camera shake, especially in low-light conditions, use a remote shutter release or your camera’s timer function when capturing images.
Practice Composition
Good composition is key in 3D photography. Pay attention to how elements are arranged in the foreground, midground, and background to create a balanced and engaging image.
Experiment with Different Subjects
Try capturing a variety of subjects to see how they translate into 3D. From still life and portraits to landscapes and architecture, each subject offers unique challenges and opportunities.
Conclusion
3D photography is an exciting and rewarding field that allows you to capture the world in a new dimension. With the right equipment and a bit of practice, beginners can create stunning three-dimensional images that captivate viewers. By following this guide and experimenting with different techniques, you’ll be well on your way to mastering the art of 3D photography. So grab your camera, embrace the world of depth, and start creating your own immersive photographic experiences.




Post Comment