Mastering 3D Landscape Photography for Stunning Visuals

In the ever-evolving world of photography, 3D landscape photography has emerged as a captivating art form that offers a unique perspective on the natural world. By adding depth and dimension to traditional landscape shots, photographers can create immersive visuals that transport viewers into the scene. Mastering 3D landscape photography requires a blend of technical skill, artistic vision, and an understanding of the natural environment. This article will guide you through the essential techniques and considerations to elevate your 3D landscape photography, resulting in stunning, lifelike images.
Understanding 3D Photography
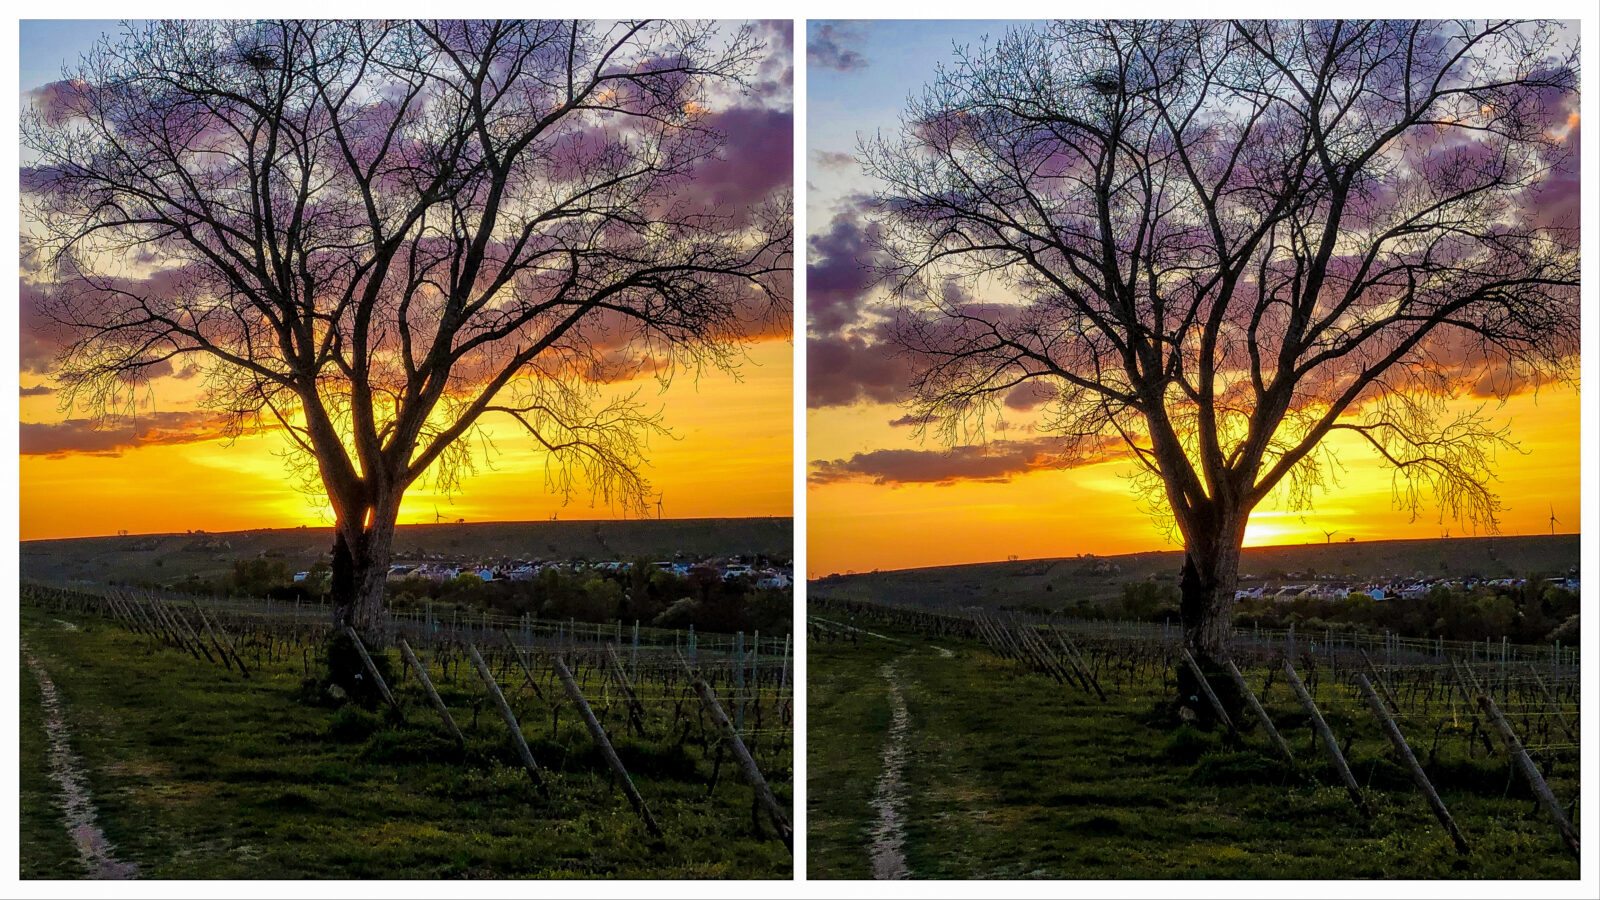
Before diving into the techniques specific to landscape photography, it is crucial to grasp the basics of 3D photography. At its core, 3D photography aims to mimic human binocular vision by capturing two slightly different images—one for each eye. This creates a stereoscopic effect that gives the illusion of depth. In the digital realm, this can be achieved through various methods, including anaglyphs, polarized light, or lenticular lenses. Understanding these techniques is the first step toward mastering 3D landscape photography.
Choosing the Right Equipment
The success of your 3D landscape photography largely depends on the equipment you use. Here are the essential tools to consider:
Cameras
While some photographers use dual-camera setups to capture stereo images, advancements in technology have made it easier to achieve 3D effects with single-lens cameras. Look for cameras with high-resolution sensors, interchangeable lenses, and, if possible, built-in 3D capabilities. Many modern cameras also come with features that facilitate post-processing for 3D effects.
Lenses
Wide-angle lenses are generally preferred for landscape photography as they capture more of the scene and enhance the sense of depth. Consider using lenses with low distortion to maintain the integrity of your 3D images. Additionally, tilt-shift lenses can be particularly useful for controlling perspective and achieving the desired depth of field.
Tripod
Stability is paramount in 3D photography to ensure that both images are perfectly aligned. A sturdy tripod will help you achieve the necessary stability and precision, especially in low-light conditions.
Techniques for Capturing 3D Landscapes
Creating stunning 3D landscape images involves more than just equipment; it requires a keen eye for composition and an understanding of light and perspective. Here are some techniques to enhance your 3D landscape photography:
Stereoscopic Pairing
To create a stereoscopic image, you need two photos taken from slightly different angles—similar to the distance between your eyes. This can be achieved by shifting your camera slightly to the side between shots. The key is to maintain consistency in exposure and composition across both images.
Hyperstereo Technique
The hyperstereo technique involves increasing the distance between your camera positions to exaggerate the depth in your images. This is particularly useful for capturing expansive landscapes where the natural depth may not be immediately apparent. However, it requires careful consideration of scale and perspective to avoid unnatural distortions.
Lighting and Shadows
Lighting plays a crucial role in enhancing the 3D effect. Early morning or late afternoon light, known as the golden hour, provides soft, directional light that accentuates texture and depth. Pay attention to shadows, as they can add an extra layer of dimensionality to your images. Experiment with different lighting conditions to discover what works best for your desired effect.
Foreground, Midground, and Background
Incorporating distinct elements in the foreground, midground, and background of your composition adds layers of depth to your images. This technique draws the viewer’s eye through the scene, creating a more immersive experience. Look for natural elements such as rocks, trees, or water features to anchor different parts of your composition.
Post-Processing Techniques
Once you have captured your images, the next step is post-processing. This is where the magic of 3D landscape photography truly comes to life. Here are some techniques to consider:
Anaglyph Creation
Anaglyphs are a popular method for creating 3D images that can be viewed with red-cyan glasses. Software such as Adobe Photoshop or specialized 3D photo editing tools can be used to align your stereo pairs and apply the anaglyph effect. Fine-tuning the alignment and adjusting the color balance are crucial steps to ensure a seamless 3D experience.
Depth Map Editing
Depth maps are grayscale images that represent the distance of objects from the camera. By creating and editing depth maps, you can enhance the 3D effect in your images. Tools like Adobe After Effects or Blender allow you to manipulate depth maps and create realistic depth-of-field effects.
3D Visualization Tools
There are various software options available for visualizing and refining 3D images. Programs like StereoPhoto Maker offer features for aligning, cropping, and adjusting stereo pairs. These tools can significantly streamline the post-processing workflow and help you achieve professional-quality results.
Overcoming Challenges in 3D Landscape Photography
3D landscape photography is not without its challenges. Here are some common obstacles and how to overcome them:
Parallax Errors
Parallax errors occur when the alignment between the two images is not perfect, resulting in ghosting or double images. To minimize parallax errors, ensure that your camera movement is consistent and that both images are taken at the same height and angle.
Motion Artifacts
Movement within the scene, such as wind-blown foliage or moving water, can create motion artifacts that disrupt the 3D effect. To mitigate this, use a fast shutter speed to freeze motion, or embrace the dynamic elements by intentionally incorporating them into your composition.
Viewer Compatibility
Not all viewers will have access to 3D glasses or compatible displays. Consider creating multiple versions of your images, such as anaglyphs, side-by-side pairs, or depth maps, to ensure your work is accessible to a wider audience.
Conclusion
Mastering 3D landscape photography is a rewarding journey that combines technical expertise with artistic expression. By understanding the principles of 3D photography, choosing the right equipment, and employing effective techniques, you can create breathtaking images that capture the beauty and depth of the natural world. Whether you are a seasoned photographer or a newcomer to the field, the world of 3D landscape photography offers endless opportunities for creativity and innovation. Embrace the challenge, experiment with new techniques, and let your images transport viewers to stunning, immersive landscapes.








Post Comment